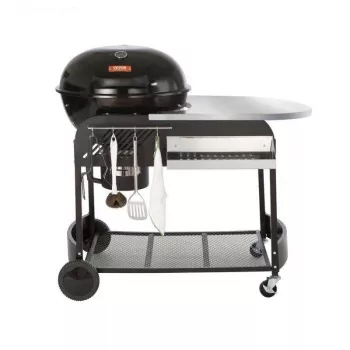
Outdoor meals run smoother when your setup supports the way you actually cook: a dependable charcoal kettle for real fire flavor, a spot to set tools and platters, and the ability to roll the grill to the best location—patio, driveway, campsite, or tailgate. Our portable charcoal kettle grill combines that classic kettle workflow with two practical upgrades you’ll notice immediately: a side table for a clean “landing zone,” and wheels so you can position the grill without wrestling it.
A kettle grill keeps live-fire cooking approachable because it’s naturally suited for both quick searing and slower finishing. With a simple coal layout, you can grill burgers and vegetables over direct heat, then shift thicker foods to indirect heat without changing equipment.
The side table is the difference between “running back inside” and staying in control. It gives you one place to park tongs, seasoning, a thermometer, and a clean platter—so you’re not balancing everything on the lid handle or a wobbly chair. Add wheels, and you can roll the grill where it behaves best: away from gusty wind, out of foot traffic, or closer to your prep area before the cooking starts.
We recommend treating the side table like a tiny prep counter with clear zones. Keep raw food on a covered tray at one end, keep clean tools in the middle, and reserve a clean platter strictly for cooked food. That separation helps you avoid accidental cross-contamination while keeping your pace steady.
A small “heat kit” makes charcoal nights feel routine: long tongs, a grill brush, an instant-read thermometer, heat-resistant gloves, and a metal container for ash handling after everything is fully cool. For cleanup, stage a foil pan for scraps and drips, plus paper towels and a sealable trash bag—so the cook ends as neatly as it starts.
Direct heat (coals under the food) is the fast lane: burgers, brats, shrimp, thin steaks, and quick vegetables. Indirect heat (coals banked to one side, food on the other) is for thicker cuts and anything that benefits from steadier, gentler heat—bone-in chicken, pork chops, whole fish, and foil-pan sides.
| Step | What to do | Side table use |
|---|---|---|
| 1. Prep the area | Choose a stable outdoor spot away from foot traffic and overhangs; position for wind | Stage tools, gloves, thermometer, and a clean platter |
| 2. Light charcoal | Use a chimney starter when possible; wait for a light ash coating before cooking | Keep matches/lighter and a timer within reach |
| 3. Set up two zones | Bank coals to one side for indirect cooking; keep a hot zone for searing | Place raw tray on one side and seasonings on the other |
| 4. Cook with intention | Sear briefly, then finish with lid on; check doneness by temperature | Use a dedicated clean plate for cooked food only |
| 5. Wind down safely | Let coals burn down; cool fully before disposal; clean grates after the cook | Hold a metal container for fully cooled ash and a trash bag for scraps |
Wheels also help you create a simple “cooking zone” boundary: keep a clear lane so you’re not rolling across where kids, pets, or guests are gathered. After cooking, let everything cool completely before relocating the grill near storage areas or any combustible materials. For general safety best practices, we recommend reviewing the NFPA’s guidance on grill placement and fire prevention: NFPA — Grill Fire Safety.
Keep charcoal dry and sealed for easier starts. For food handling, stick to the basics every time—clean, separate, cook, and chill. The CDC’s overview is a solid refresher: CDC — Food Safety (Clean, Separate, Cook, Chill). You can also review grilling-specific tips from USDA FSIS: USDA FSIS — Grilling Food Safety.
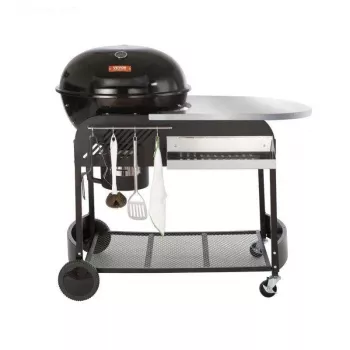
Portable Charcoal Kettle Grill with Side Table and Wheels for Outdoor Cooking
If you like having a stable spot near the door for trays, buns, and drinks (especially when you’re hosting), a simple indoor staging surface can help you stay organized before you step outside: Elegant Round Cream Coffee Table.
| Cooking style | Why it works well | What to prepare ahead |
|---|---|---|
| Weeknight grilling | Side table reduces trips and keeps tools handy | Seasonings, a clean platter, quick sides |
| Casual hosting | Wheels help position the grill for convenience and safety | Batch skewers, buns, sauces, beverages |
| Outdoor weekends | Portable format supports flexible placement | Charcoal storage, foil sides, thermometer |
For many everyday cooks, a small-to-medium chimney’s worth is a practical starting range, with more needed for cold, windy weather or thicker foods. Start modestly so you can control heat, then add a bit more charcoal if you need a longer burn or stronger sear.
Bank the lit coals to one side to create a hot zone and a cooler zone, then cook on the cooler side with the lid on. Move food between zones to manage doneness and handle flare-ups without overcooking the outside.
Let coals and ash cool completely, then transfer ash into a metal container for disposal and keep it away from anything combustible. Cleaning out ash regularly also makes your next cook easier to light and less messy.









Leave a comment